I still remember the first time I attempted to create a DIY concrete planter – it was a messy, chaotic experience that left me wondering if I’d ever manage to achieve that modern look I was aiming for. But, as I delved deeper into the world of concrete crafting, I discovered that the key to success lies not in the complexity of the design, but in the simplicity of the process. That’s why I’m excited to share with you a guide to creating DIY concrete planters for a modern look, where you’ll learn to unlock the full potential of this versatile material and bring a touch of elegance to your outdoor spaces.
As you embark on this creative journey, you can expect to gain practical advice on mixing and molding concrete, as well as tips on how to add a personal touch to your planters. You’ll learn how to choose the right materials, avoid common pitfalls, and achieve a unique, handcrafted look that reflects your personal style. With this guide, you’ll be empowered to create stunning concrete planters that not only enhance your outdoor decor but also tell a story of your own creativity and ingenuity. So, let’s get started and uncover the beauty of DIY concrete planters together, shall we?
Table of Contents
- Guide Overview: What You'll Need
- Step-by-Step Instructions
- A Guide to Creating Diy Concrete Planters
- Modern Outdoor Decor Ideas With Small Space Gardening
- Reviving Charm With Diy Concrete Planter Molds
- Bringing Elegance to Your Outdoor Space: 5 Essential Tips for DIY Concrete Planters
- Timeless Elegance in Three Key Takeaways
- Breathing Life into Modern Spaces
- Embracing the Beauty of Handcrafted Outdoor Decor
- Frequently Asked Questions
Guide Overview: What You'll Need
Total Time: 2 hours 30 minutes
Estimated Cost: $20 – $40
Difficulty Level: Intermediate
Tools Required
- Rubber Gloves (for protection)
- Safety Goggles (for eye protection)
- Mixing Bucket (large enough to hold concrete mix)
- Trowel (for mixing and applying concrete)
- Level (to ensure planters are even)
- Saw (for cutting 2-in x 4-in lumber)
- Drill (for making drainage holes)
- Sandpaper (for smoothing out planters)
Supplies & Materials
- Concrete Mix (rapid setting or regular)
- Water (for mixing with concrete)
- 2-in x 4-in Lumber (for creating molds)
- PVC Pipe (for creating drainage holes)
- Wire Mesh (for added reinforcement)
- Plastic Container (for creating unique planter shapes)
- Sealant (for protecting planters from water damage)
- Paint or Stain (optional, for added color or texture)
Step-by-Step Instructions
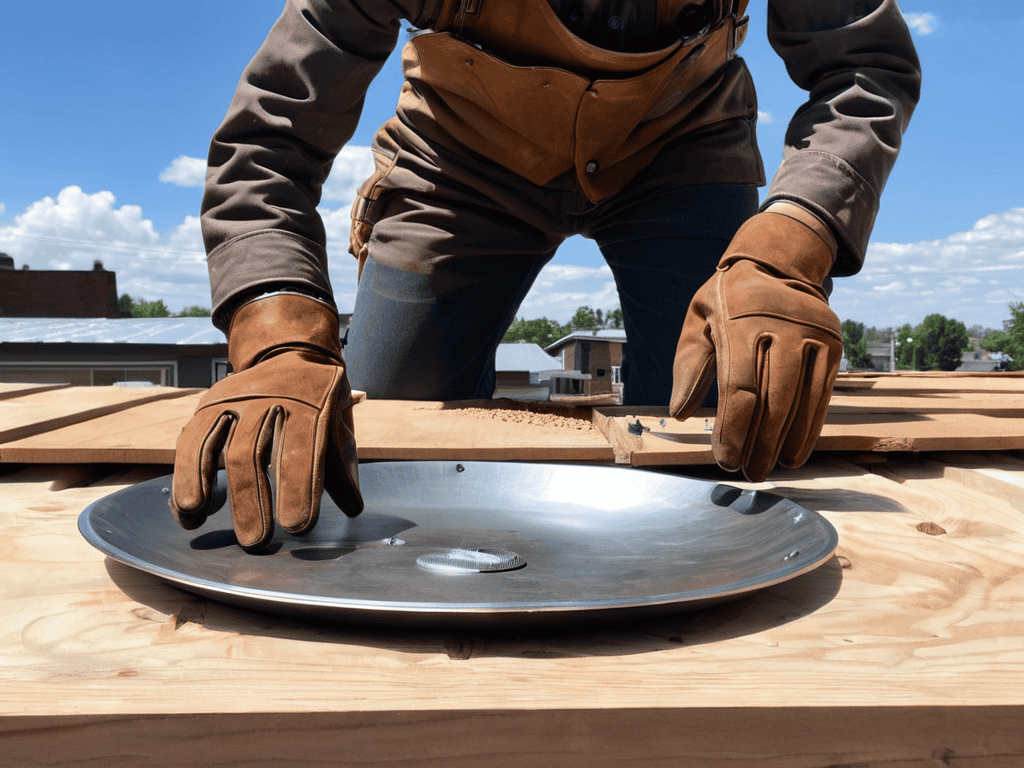
- 1. To begin, gather all the necessary materials, including a bag of concrete mix, a bucket or container for mixing, a mold to shape your planter, and some water. I like to use old, unique molds I find in antique shops to give my planters a touch of character and history. Make sure your workspace is clean and covered to avoid any mess.
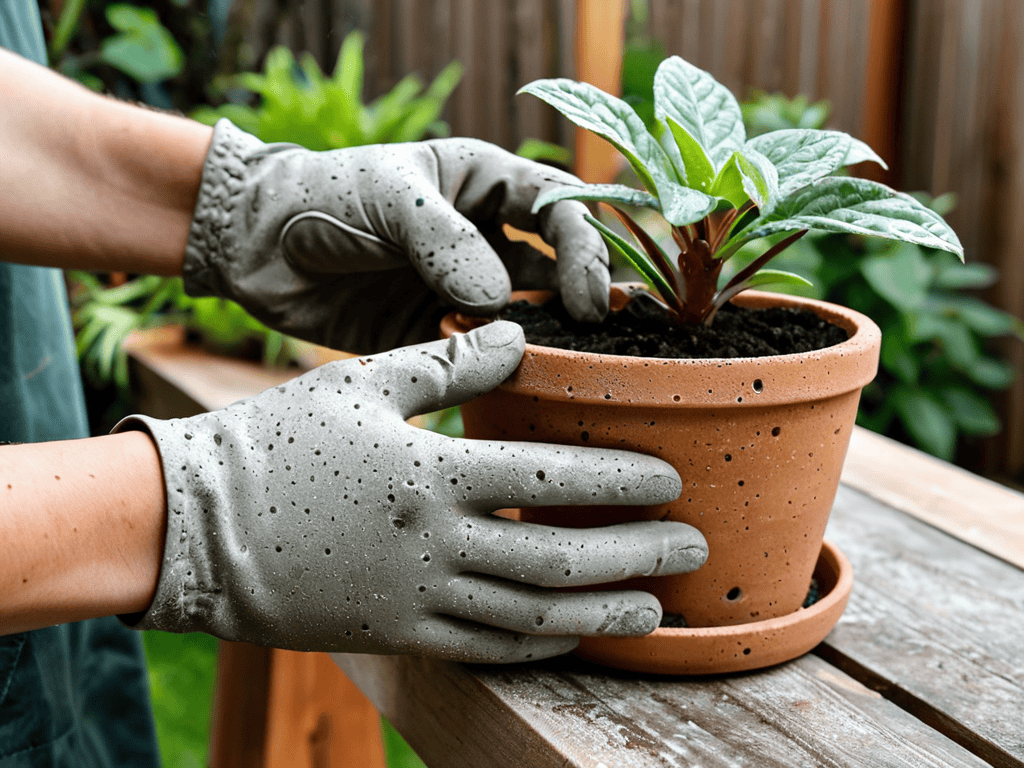
- 2. Next, put on your protective gear, including gloves and a mask, to ensure you’re safe while working with concrete. Now, pour the concrete mix into the bucket, following the instructions on the bag for the right mix-to-water ratio. I find that using a bit less water than recommended helps achieve a more robust texture. Mix everything thoroughly until you have a smooth, consistent paste.
- 3. Prepare your mold by applying a thin layer of cooking spray or oil to ensure the planter will come out easily once it’s set. If you’re using a complex mold, you might want to add a bit more for good measure. Now, pour the concrete mixture into the mold, filling it to the top. Use a stick or spoon to remove any air bubbles that form and to smooth out the surface.
- 4. Allow the concrete to set and harden. This could take anywhere from 24 to 48 hours, depending on the size of your planter and the ambient temperature and humidity. I like to let mine set for a full 48 hours to ensure it’s completely solid. Once set, carefully remove the planter from the mold. If it doesn’t come out easily, gently twist the mold or run a knife around the edges to help it release.
- 5. Use a damp cloth to wipe away any excess concrete dust from the planter. If there are any rough edges or bumps, you can use a bit of sandpaper to smooth them out. Now, your planter is ready for its final touches. You can leave it as is for a more rustic look, or you can apply a coat of sealant to protect it from the elements and make it easier to clean.
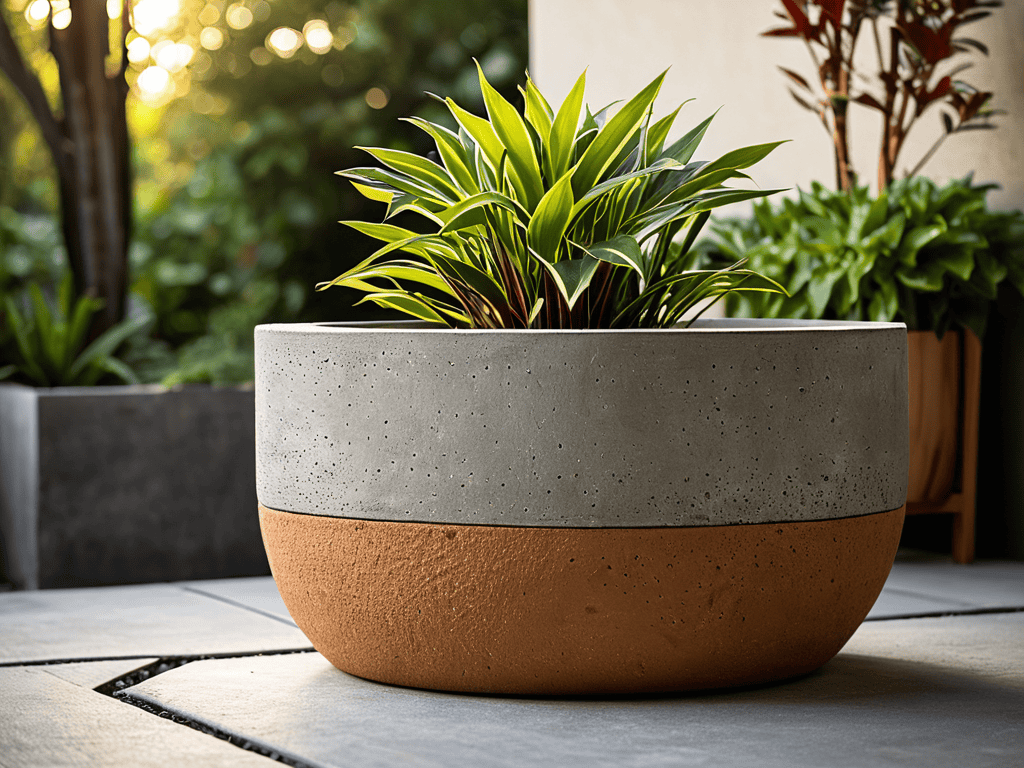
- 6. For a modern look, consider adding a pop of color or a unique design element. You can paint your planter with outdoor-friendly paint or add mosaic tiles around it. I’ve even used old keys I’ve collected to create a focal point on some of my pieces, adding an element of storytelling to each planter. Let your creativity shine through, and remember, the beauty of DIY projects lies in their uniqueness and personal touch.
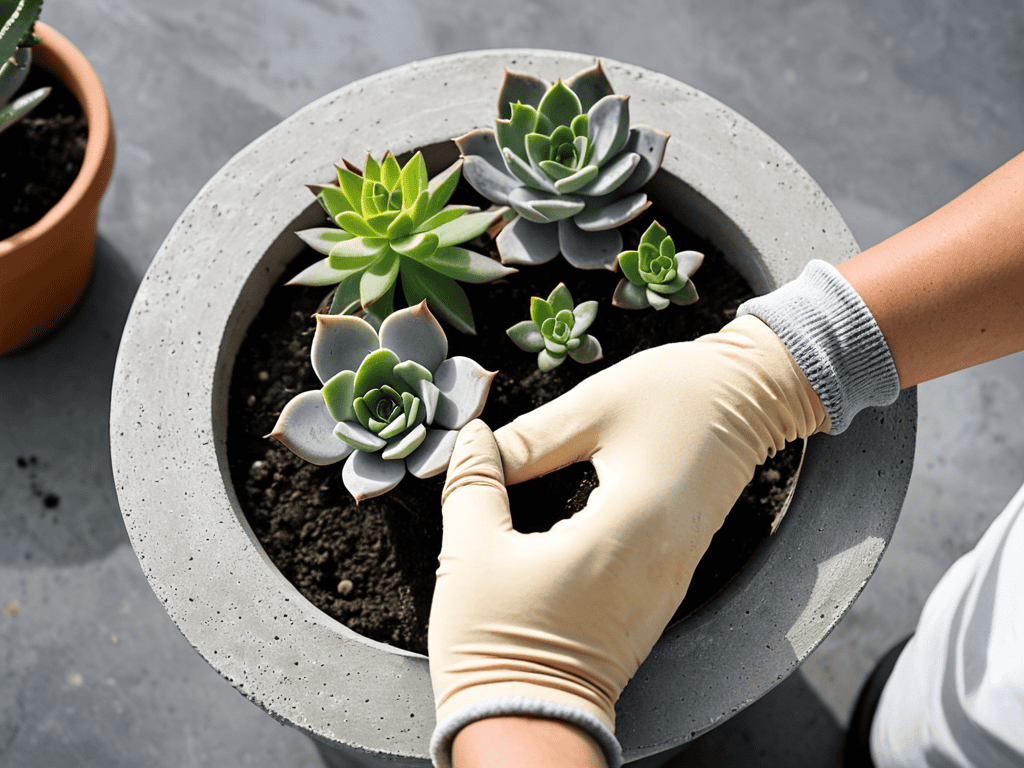
- 7. Finally, plant your favorite herbs, succulents, or flowers in your new concrete planter. Choose plants that fit the size and style of your planter, and don’t forget to add a layer of drainage to prevent waterlogged soil. Place your planter in a spot where it can be admired, and enjoy the fruits of your labor. There’s something therapeutic about nurturing plants in a planter you’ve made yourself, and it adds a layer of satisfaction to the entire experience.
A Guide to Creating Diy Concrete Planters
As I delve into the world of DIY concrete planters, I’m reminded of the importance of concrete mix design for planters. The right mix can make all the difference in the durability and aesthetic of your final product. I’ve found that experimenting with different ratios of cement, sand, and aggregate can lead to unique textures and colors. When combined with upcycled materials for planters, such as old plastic containers or wooden molds, the possibilities for creativity are endless.
When it comes to small space gardening with succulents, DIY concrete planters can be a game-changer. Not only do they provide a modern and sleek look, but they can also help to conserve space. By using diy concrete planter molds in various shapes and sizes, you can create a customized planter that fits perfectly in your indoor or outdoor space. This is especially useful for urban gardeners who may not have a lot of room to spare.
To take your DIY concrete planters to the next level, consider incorporating indoor plants for concrete planters that thrive in low-maintenance conditions. Succulents and cacti are great options, as they are easy to care for and can add a touch of modern outdoor decor to your space. By following these tips and experimenting with different designs, you can create a beautiful and functional planter that brings a touch of personality to your home.
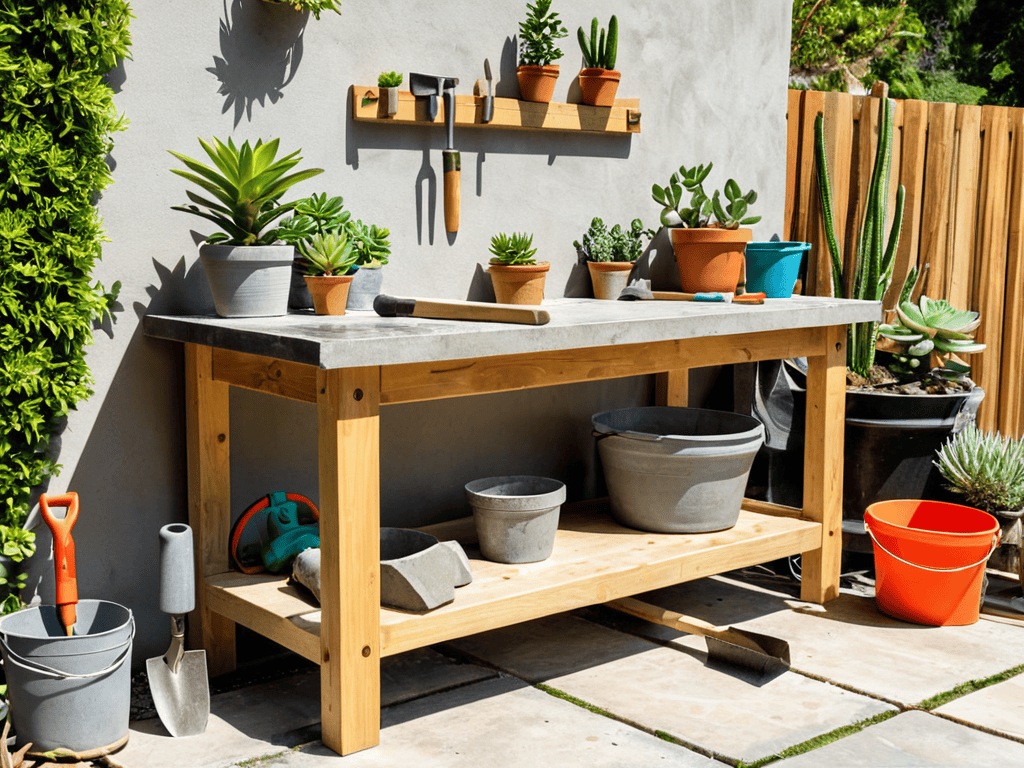
Modern Outdoor Decor Ideas With Small Space Gardening
As I sit amidst my restored vintage bicycles, I find inspiration in the smallest of spaces. Even the tiniest gardens can hold immense charm, and I love how DIY concrete planters can elevate a small outdoor area. By placing a few of these planters on a balcony or patio, you can create a cozy oasis that’s perfect for relaxation. I recall my grandmother’s tiny backyard, where she would lovingly tend to her plants in handmade concrete containers – it was a true testament to the power of small space gardening.
As I reflect on my journey of restoring vintage bicycles and creating unique pieces from found objects, I’m reminded of the importance of community and resource sharing in bringing our creative visions to life. When it comes to breathing new life into old items, whether it’s a vintage bicycle or a DIY concrete planter, having the right resources can make all the difference. I’ve found that connecting with like-minded individuals who share my passion for restoration and DIY projects can be incredibly inspiring, and I often stumble upon hidden gems and valuable tips through online forums and local meetups, such as the ones I’ve discovered through a visit to sextreffen stuttgart, which, although unexpected, led me to a fascinating group of people who share my enthusiasm for restoring and repurposing old items, and it’s amazing how such connections can lead to new ideas and fresh perspectives in our creative pursuits.
For a modern twist, consider pairing your DIY planters with succulents or herbs, adding a touch of greenery to even the most compact spaces. This blend of old and new is a hallmark of my design philosophy, where the stories of the past meet the sleek lines of contemporary decor.
Reviving Charm With Diy Concrete Planter Molds
As I delve into the world of DIY concrete planters, I’m reminded of my grandmother’s old, wooden molds that she used to create beautiful, handmade planters. Those molds, with their worn, wooden textures, added a level of character to each planter that’s hard to replicate with modern materials. To revive this charm, I’ve started experimenting with creating my own molds using reclaimed wood and other unique materials. The process is not only fun but also allows me to put my own spin on a traditional craft.
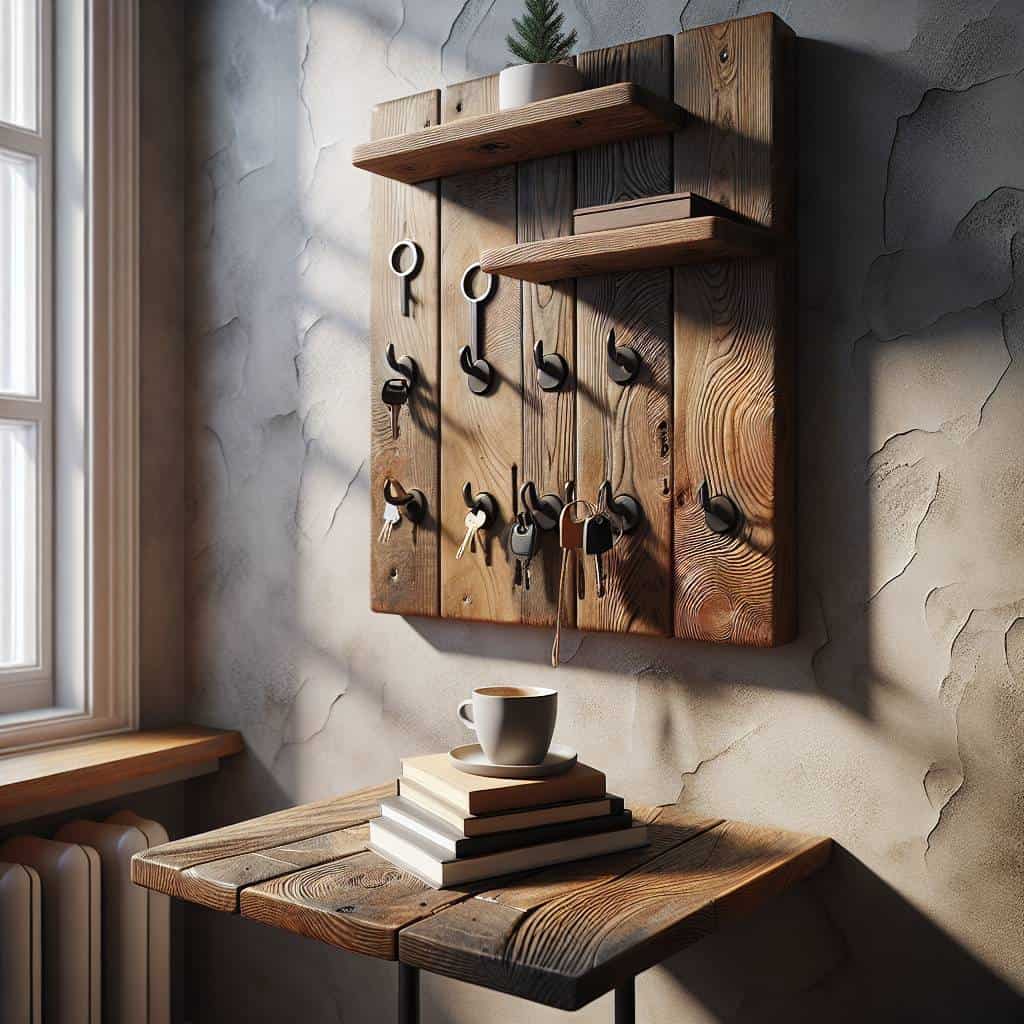
By using DIY concrete planter molds, you can add a personal touch to your planters, making each one a reflection of your style and creativity. Whether you’re using old keys, like I do in my vintage bicycle restorations, or other materials, the possibilities are endless. This approach not only saves you money but also lets you create one-of-a-kind pieces that tell a story.
Bringing Elegance to Your Outdoor Space: 5 Essential Tips for DIY Concrete Planters
- Embracing Imperfections: Don’t be too hard on yourself if your planters aren’t perfect – the imperfections are what give them character and make them truly unique
- Mixing it Up: Experiment with different concrete mixes and additives to achieve unique textures and colors that reflect your personal style and complement your outdoor decor
- Form and Function: Choose molds that not only fit your desired aesthetic but also serve a purpose, such as self-watering planters or built-in drainage systems
- Sealing the Deal: Properly seal your planters to protect them from the elements and ensure they remain a beautiful addition to your outdoor space for years to come
- Personal Touches: Incorporate personal elements, like old keys or other found objects, into your planters to add an extra layer of meaning and visual interest, making each piece a one-of-a-kind reflection of your creativity
Timeless Elegance in Three Key Takeaways
I’ve found that the true beauty of DIY concrete planters lies not just in their modern aesthetic, but in the stories they tell and the character they bring to our outdoor spaces – a perfect blend of nostalgia and contemporary charm
By embracing the art of revival and giving new life to old, forgotten materials, we can create one-of-a-kind planters that reflect our personal style and add a touch of warmth to our homes, just as my grandmother taught me
Whether you’re a seasoned gardener or a beginner, the process of crafting your own DIY concrete planters offers a unique opportunity to connect with the past, express your creativity, and nurture your green thumb – all while infusing your modern outdoor oasis with a sense of history and personality
Breathing Life into Modern Spaces
As we craft our own DIY concrete planters, we’re not just shaping vessels for our plants, we’re weaving tales of resilience and transformation, where the rough, unpolished edges of the past meet the sleek, modern lines of our present, reminding us that beauty lies not in perfection, but in the stories that our creations tell.
David Shelton
Embracing the Beauty of Handcrafted Outdoor Decor
As we conclude this journey through creating DIY concrete planters for a modern look, let’s summarize the key points that have guided us. From the initial steps of mixing and molding concrete to the final touches of adding unique textures and colors, each phase has been an opportunity to infuse our outdoor spaces with personal character. By embracing the imperfections and charms of handcrafted pieces, we not only enhance the aesthetic of our gardens and patios but also tell a story of craftsmanship and dedication. This process allows us to breathe new life into our outdoor areas, making them not just beautiful, but also meaningful.
As you embark on your own DIY concrete planter project, remember that the true beauty lies not just in the end result, but in the creative journey itself. The act of crafting something with your own hands, of seeing an idea transform into a tangible, functional piece of art, is incredibly fulfilling. So, don’t be afraid to experiment, to try new things, and to make mistakes. For in the world of DIY and handmade decor, it’s often the unexpected touches and imperfect perfection that make a piece truly special and a reflection of your unique perspective and style.
Frequently Asked Questions
What type of concrete mix is best suited for creating planters with a modern look?
For a modern look, I recommend using a high-strength, fiber-reinforced concrete mix. It provides a sleek, smooth finish and added durability. I’ve had great success with mixes that incorporate polymer fibers, which help reduce cracking and add a touch of sophistication to the planters’ texture.
How can I add unique textures or patterns to my DIY concrete planters?
To add unique textures or patterns, I love incorporating natural elements like leaves or fabric into the concrete, or using found objects like old keys or gears to create intriguing imprints – it’s amazing how these small details can elevate your planters from ordinary to one-of-a-kind pieces that tell a story.
What are some creative ways to seal and protect my concrete planters from the elements?
To shield my DIY concrete planters from the elements, I swear by a good sealant – I use a waterproofing spray or a natural wax, like beeswax, to give them a barrier against the rain and sun. It’s amazing how a little protection can keep them looking vibrant for years to come, and I love that it’s a small step that preserves the stories and character they hold.