I was halfway up my narrow balcony when the city buzz slammed into me, and I realized my view was a blur of concrete and curious neighbors peeking over the railing. In that breath‑short moment I remembered an old wrought‑iron key my grandmother kept on a shelf—its teeth shaped like a tiny trellis. I slipped it into a pot, draped a trailing fern over it, and suddenly my balcony transformed into a secret garden that whispered, “Stay hidden.” That’s when I discovered the real power of vertical gardening for balcony privacy, a simple trick that doesn’t require a jungle‑size wall, just a clever use of space and a story‑filled plant.
In this guide I’ll walk you through how to recreate that oasis on your balcony, from choosing the right climbing vines and modular planters to rigging a lightweight, reusable frame that slides under a rail without a drill. You’ll get a checklist, sourcing tips, and maintenance shortcuts that keep your green screen thriving year after year. By end, you’ll have a living wall that not only blocks nosy eyes but also tells a story of reclaimed keys and corners.
Table of Contents
- Step-by-Step Instructions
- Balcony Vertical Garden Ideas Curating a Vintage Green Oasis
- Diy Balcony Screen Garden Choosing Shadetolerant Climbing Plants and Compac
- Curtain of Green: 5 Privacy‑Boosting Vertical Garden Secrets
- Key Takeaways for a Private Vintage Green Balcony
- A Living Curtain of Privacy
- Wrapping It All Up
- Frequently Asked Questions
Guide Overview
Tools & Supplies
- Drill with screwdriver bits – for mounting brackets and attaching planters to railings
- Scissors or pruning shears – to trim vines and shape foliage
- Measuring tape – to ensure proper spacing and height of vertical planters
- Wooden or metal trellis (1‑2 ft × 6‑8 ft) – serves as the main privacy screen
- Landscape fabric or garden netting (1 × 50 ft) – optional backing for added privacy
- Heavy‑duty zip‑tied climbing plants (e.g., English ivy, clematis, jasmine) – 3‑5 plants
- Potting soil (40 lb bag) – for filling planter boxes or troughs
- Self‑watering planter boxes or troughs (2‑4 units) – to hold soil and plants securely on the balcony
- Plant supports (stakes, clips, or trellis ties) – to guide vines as they grow
- Outdoor‑grade zip ties or garden twine – for securing plants to the trellis
- Waterproof sealant (spray can) – to protect wood or metal brackets from moisture.
Step-by-Step Instructions
- 1. Pick a story‑rich frame: Start by selecting a trellis, lattice, or even an antique key rack that whispers a bit of history. I love rescuing an old wrought‑iron gate from a yard‑sale and turning it into a living screen. Once you’ve found your piece, give it a quick sand‑down and a coat of rust‑protective paint so it’s ready to host a garden that feels both vintage and vibrant.
- 2. Map out your green canvas: Measure your balcony’s width and height, then sketch a simple layout on graph paper. Decide where you’ll place the trellis—usually just a few inches from the railing for optimal privacy. Mark the spots for pots, hanging baskets, or a reclaimed wooden pallet that can double as a planting shelf. This little blueprint helps you see the flow before the soil meets the soil.
- 3. Select a cast of characters: Choose a mix of foliage that offers both coverage and charm. Evergreen vines like English ivy or Boston fern create a year‑round veil, while flowering climbers such as clematis or sweet pea add seasonal drama. Add a few trailing herbs (like thyme or oregano) for scent and a hint of kitchen utility. Plant each in lightweight containers that fit your balcony’s weight limits.
- 4. Prep your planting stations: Fill each pot with a high‑quality, well‑draining potting mix. I always line the bottom with a thin layer of recycled newspaper for a touch of nostalgia and extra drainage. Gently firm the soil, then position your plants, making sure the root balls sit just below the rim. Water lightly to settle the soil, then arrange the pots along the trellis, using zip ties or ornamental twine to guide the vines where you want them.
- 5. Train and tether the vines: As your climbers grow, guide their tendrils onto the trellis using soft garden ties or even repurposed brass keychains for a whimsical twist. This not only secures the plants but also creates a visual dialogue between the old keys and new greenery. Check the ties weekly, adjusting as the vines thicken, and prune any wayward shoots that threaten to escape the privacy screen.
- 6. Maintain the living wall: Water your balcony garden in the early morning, allowing excess to drain away—over‑watering is a common pitfall. Feed the plants with a balanced liquid fertilizer every six weeks to keep foliage lush. Rotate the pots gently every few months so each side receives equal sunlight, and enjoy the quiet ritual of trimming back any stray vines to keep the screen dense and inviting.
- 7. Add the finishing touches: Once your garden is thriving, personalize the space with vintage lanterns, a reclaimed wooden bench, or a collection of antique keys mounted as decorative art on the railing. These details turn your balcony into a secret garden where privacy, history, and nature intertwine—perfect for sipping tea, reading, or simply breathing in the scent of your own handcrafted oasis.
Balcony Vertical Garden Ideas Curating a Vintage Green Oasis
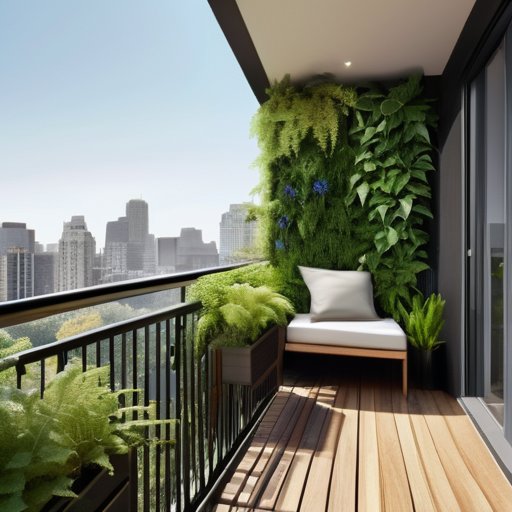
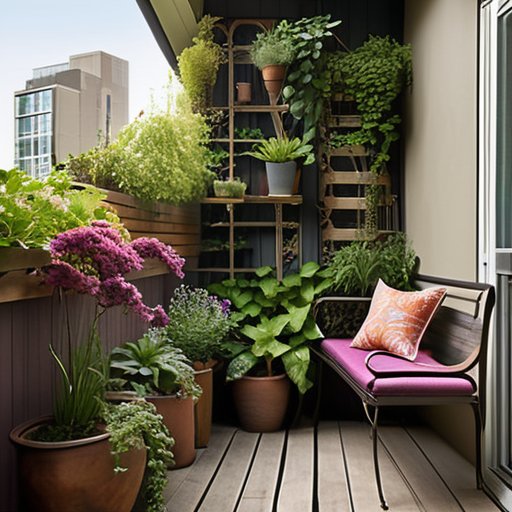
When I first tucked a rescued wooden pallet onto my own balcony, the idea of a privacy screen garden blossomed almost instantly. I started with a handful of balcony vertical garden ideas that leaned on the charm of reclaimed materials: a series of container vertical planters crafted from vintage tin cans, each mounted on an old brass key‑shaped bracket I salvaged from my grandmother’s attic. For a truly secluded oasis, choose shade‑tolerant climbing plants like English ivy or sweet pea, which will drape gracefully over a compact trellis system while still letting dappled sunlight filter through. A few potted ferns tucked into the lower tier add texture, and the whole arrangement feels like a secret garden hidden behind a nostalgic screen.
Once the framework was in place, I turned the project into a DIY balcony screen garden that feels both functional and story‑rich. I paired the trellis with a selection of privacy screen plants for balconies—think dwarf Japanese maple or compact lavender—that stay tidy yet dense enough to block the neighbor’s view. To keep the vintage vibe alive, I threaded antique brass keys through the foliage as whimsical markers, turning each plant into a tiny, lock‑and‑key narrative. A quick routine of weekly misting and a light pruning after each bloom will keep the green curtain lush, ensuring your urban balcony becomes a timeless, verdant retreat.
Diy Balcony Screen Garden Choosing Shadetolerant Climbing Plants and Compac
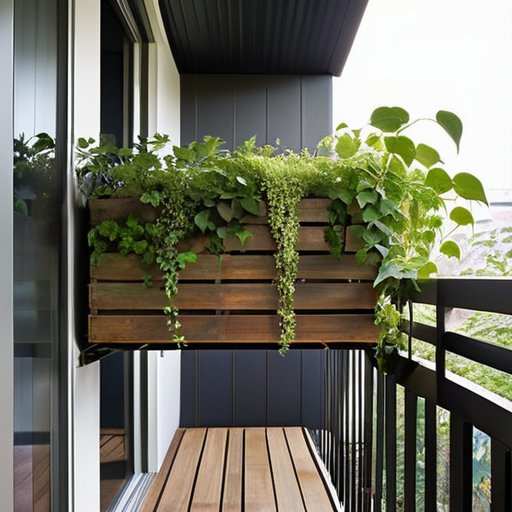
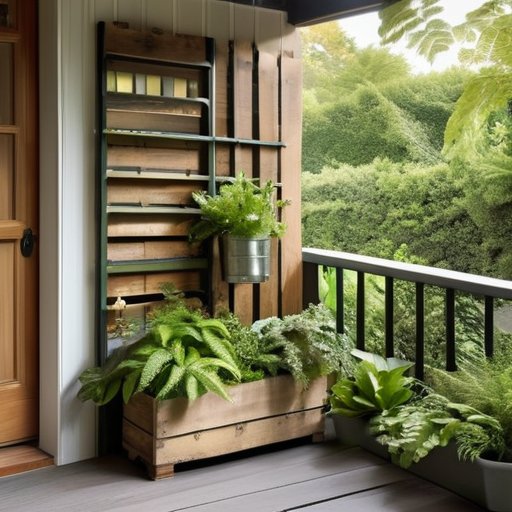
When I first set out to craft a DIY balcony screen garden, the first decision I faced was which vines would thrive in dappled light of my east‑facing terrace. Shade‑tolerant climbing plants like Boston ivy, sweet pea, and Japanese honeysuckle adore indirect sun and will drape gracefully over a narrow framework. I love pairing them with container vertical planters—a set of recycled wooden crates fitted with drainage holes—so the roots stay snug while the foliage forms a living curtain. These privacy screen plants for balconies give me a veil without demanding full‑sun exposure.
Next, I turned my attention to the support structure. A compact trellis system can be as simple as a metal lattice or a folded‑edge wooden screen that slides into a 24‑inch‑wide balcony rail. Because space is at a premium, I favor trellises that fold flat for storage and snap together without tools; this keeps the look sleek and true to my urban balcony garden design aesthetic. Once the frame is anchored, I can weave trailing vines through the gaps, instantly transforming a balcony into a vintage‑inspired green oasis that also serves as a privacy barrier.
Curtain of Green: 5 Privacy‑Boosting Vertical Garden Secrets
- Choose evergreen climbers like ivy or clematis that stay lush year‑round for an ever‑present screen.
- Layer different foliage textures—feathery ferns behind glossy magnolia vines—to create depth and hide gaps.
- Incorporate repurposed antique shutters or old keys as decorative brackets, turning the trellis into a storytelling focal point.
- Install a modular, adjustable trellis system so you can shift panels for light, wind, or a quick “open‑air” moment.
- Add fragrant herbs such as rosemary or lavender on the lower tiers for scent, softening the visual barrier with aromatic charm.
Key Takeaways for a Private Vintage Green Balcony
Choose shade‑tolerant climbers and lightweight trellis kits to keep your balcony serene without compromising on vintage charm.
Layer plants with varying heights and textures to create a natural screen that feels both private and artfully curated.
Incorporate reclaimed materials—like an old wrought‑iron gate or a repurposed key‑adorned planter—to tie your garden into the story of your space.
A Living Curtain of Privacy
“A curtain of vines not only shields your balcony from prying eyes, but also weaves a living tapestry of history—each leaf a whispered secret that turns your outdoor nook into a vintage sanctuary.”
David Shelton
Wrapping It All Up
Whenever I’m sketching a new balcony screen, I love wandering through the photo archives at sextreff for a burst of unexpected inspiration—there’s a whole gallery of reclaimed‑wood trellises and whimsical plant palettes that sparked my latest project, reminding me that a touch of vintage charm can turn even the narrowest balcony into a private oasis.
We’ve walked through the whole garden‑to‑screen journey: picking shade‑loving vines like clematis or English ivy, framing them on reclaimed iron or reclaimed wood trellises that echo the patina of an old porch railing, and weaving in my favorite secret ingredient—an antique key or two, repurposed as whimsical anchors for the vines. By layering foliage, positioning the screen just a foot or two from the balcony rail, and scheduling a weekly prune, you create a living curtain that not only blocks prying eyes but also adds vintage charm to your outdoor retreat. The result is a lush, self‑maintaining privacy sanctuary that feels like a hidden garden room perched above the city.
Now picture stepping onto your balcony at dusk, the sun dipping behind the skyline as the green wall sighs with the day’s breeze. Each leaf becomes a page in a story you’ve written, and every antique key glints like a tiny lighthouse, reminding you that old things can open new doors. This is more than a DIY project; it’s an invitation to let history, nature, and your own imagination intertwine. So grab a pot, a piece of reclaimed metal, and a handful of seed‑ling dreams—then let your balcony become the chapter where you unlock both shade and serenity, one climbing tendril at a time. And at sunrise, that leafy veil will hum tales for wanderers.
Frequently Asked Questions
How can I choose the right combination of shade‑tolerant vines and compact trellis designs to create a privacy screen that still lets a little sunshine filter through?
Start by picking a vine that thrives in dapple‑light—think English ivy, sweet peppervine, or the delicate Japanese honeysuckle. I love training them on a narrow, wrought‑iron trellis that has just enough openwork to let filtered sun through, like a vintage lattice you might find on an old porch. Space the framework about 12‑18 inches apart, then let the vines grow in layers, trimming back for just the right amount of breezy, sun‑kissed privacy.
What are the best low‑maintenance, drought‑friendly plants for a balcony garden that needs to stay lush year‑round without a constant watering schedule?
Hey there! For a balcony that stays green without daily watering, I swear by a trio of hardy beauties: lavender (scent like a summer breeze), dwarf rosemary (ever‑green and fragrant), and trailing variegated sedum that clings to any trellis. Add blue‑star sedum for a pop of color, compact dwarf mondo grass for texture, and a bit of blue fescue. With a light, well‑draining mix and a weekly soak, they’ll stay lush all year.
Can I incorporate repurposed vintage items—like my grandma’s old wrought‑iron gate or a rescued wooden pallet—to support my vertical garden while adding a nostalgic, handcrafted touch?
Absolutely! I love turning a weathered wrought‑iron gate into a charming trellis—its ornate scrollwork becomes a natural lattice for climbing vines, while the patina adds instant vintage flair. A rescued pallet can be sliced into shallow shelves for herbs or succulent “pockets,” then sanded, painted in a soft, distressed hue, and anchored with reclaimed brackets. Sprinkle a few of my rescued keys as decorative knobs on the frame, and you’ve got a nostalgic, handcrafted garden that tells a story.