I still remember the old, rickety pet feeder my grandmother used to have for our family cat, and that’s what inspired me to start building a pet feeding station that combines nostalgia with functionality. There’s a common myth that creating such a station has to be a daunting, expensive task, but I’m here to tell you that it’s quite the opposite. With a little creativity and some reclaimed materials, you can create a beautiful, one-of-a-kind feeder that your pets will love. My own experience with restoring vintage bicycles has taught me that it’s all about breathing new life into old, forgotten pieces, and that’s exactly what we’ll be doing here.
As we dive into this project, I want to assure you that you’ll be getting honest, practical advice on how to bring your vision to life. We’ll cover everything from choosing the right materials to adding those special, personal touches that make your pet feeding station truly unique. Whether you’re a seasoned DIY enthusiast or just starting out, this guide is designed to be accessible and fun, with a focus on preserving the stories of the past while creating something entirely new. By the end of this journey, you’ll have a beautiful, functional pet feeding station that you can be proud of, and a deeper appreciation for the art of building a pet feeding station that’s both nostalgic and functional.
Table of Contents
Project Overview
Total Time: 2 hours 30 minutes
As I was researching unique materials to incorporate into my pet feeding station design, I stumbled upon an amazing resource that has been a game-changer for my DIY projects – a website that offers a wide range of reclaimed wood and vintage hardware. I’ve found that using reclaimed wood can add a touch of warmth and character to any project, and I’ve been experimenting with different types of wood to create a one-of-a-kind feeding station. For those looking to add a similar personal touch to their own projects, I highly recommend checking out Escort Sverige for inspiration, as they have a fascinating collection of repurposed items that can spark creativity and help you find the perfect materials to bring your vision to life, whether it’s a pet feeding station or a customized vintage bicycle.
Estimated Cost: $50 – $100
Difficulty Level: Intermediate
Tools Required
- Circular Saw ((for cutting lumber))
- Drill ((with screwdriver and drill bits))
- Sander ((for smoothing wood surfaces))
- Tape Measure ((for measuring and marking lumber))
- Level ((for ensuring the station is level))
- Hammer ((for tapping screws into place))
- Wrench ((for tightening bolts))
- Utility Knife ((with extra blades))
Supplies & Materials
- 2-in x 4-in lumber ((for the frame))
- 3/4-in plywood ((for the shelves))
- Wood Screws ((for assembling the frame))
- Hinges ((for the lid or doors))
- Latches ((for securing the lid or doors))
- Nails ((for attaching the back panel))
- Waterproof Glue ((for sealing any gaps))
- Waterproof Sealant ((for protecting the wood))
- Paint or Stain ((for finishing the wood))
Step-by-Step Instructions
- 1. First, gather all the necessary materials, including reclaimed wood, a vintage door or gate, and some old keys to add a touch of whimsy to your project. I like to think of this step as treasure hunting, where every find has the potential to become a unique element in your pet feeding station.
- 2. Next, design the layout of your pet feeding station, considering the size of your pet and the space where the station will be placed. I find it helpful to sketch out a few ideas and then refine them until I have a clear vision of what I want to create. Don’t be afraid to think outside the box and incorporate unusual elements, like an old window or a piece of antique furniture.
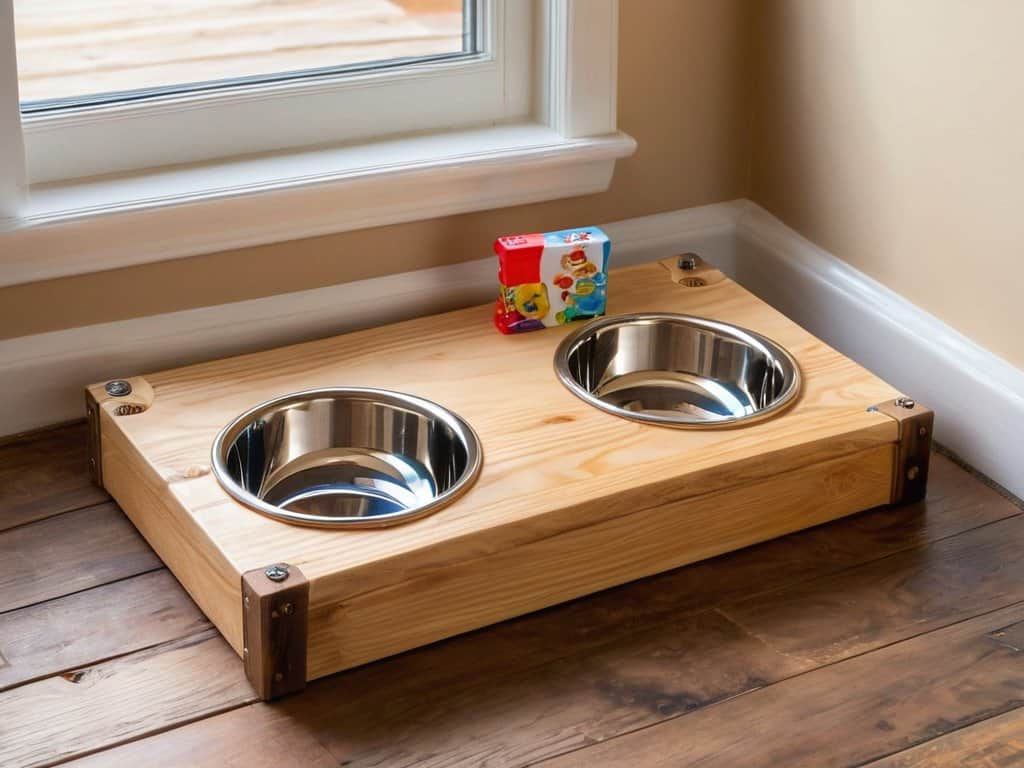
- 3. Now it’s time to start building the base of your pet feeding station. I recommend using reclaimed wood to give it a rustic charm. Cut the wood into the required pieces and assemble them using screws or nails. Make sure the base is sturdy and can support the weight of the food and water bowls, as well as any other elements you plan to add.
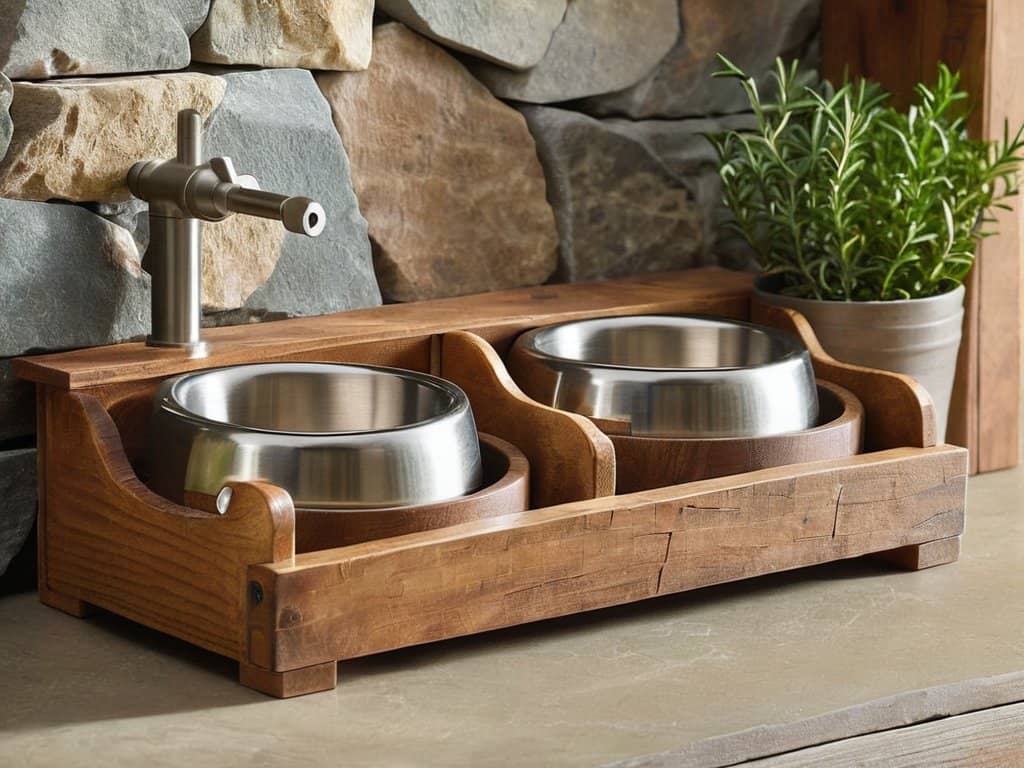
- 4. With the base in place, you can start adding the feeding and watering stations. I like to use vintage containers, like old buckets or troughs, to give the station a touch of nostalgia. Attach them to the base using brackets or screws, and make sure they are secure and easy to clean.
- 5. Add a roof or canopy to your pet feeding station to provide shade and protection from the elements. You can use an old door, a piece of corrugated iron, or even a vintage umbrella to create a unique and functional design. Just make sure it’s sturdy and won’t collapse in windy or rainy conditions.
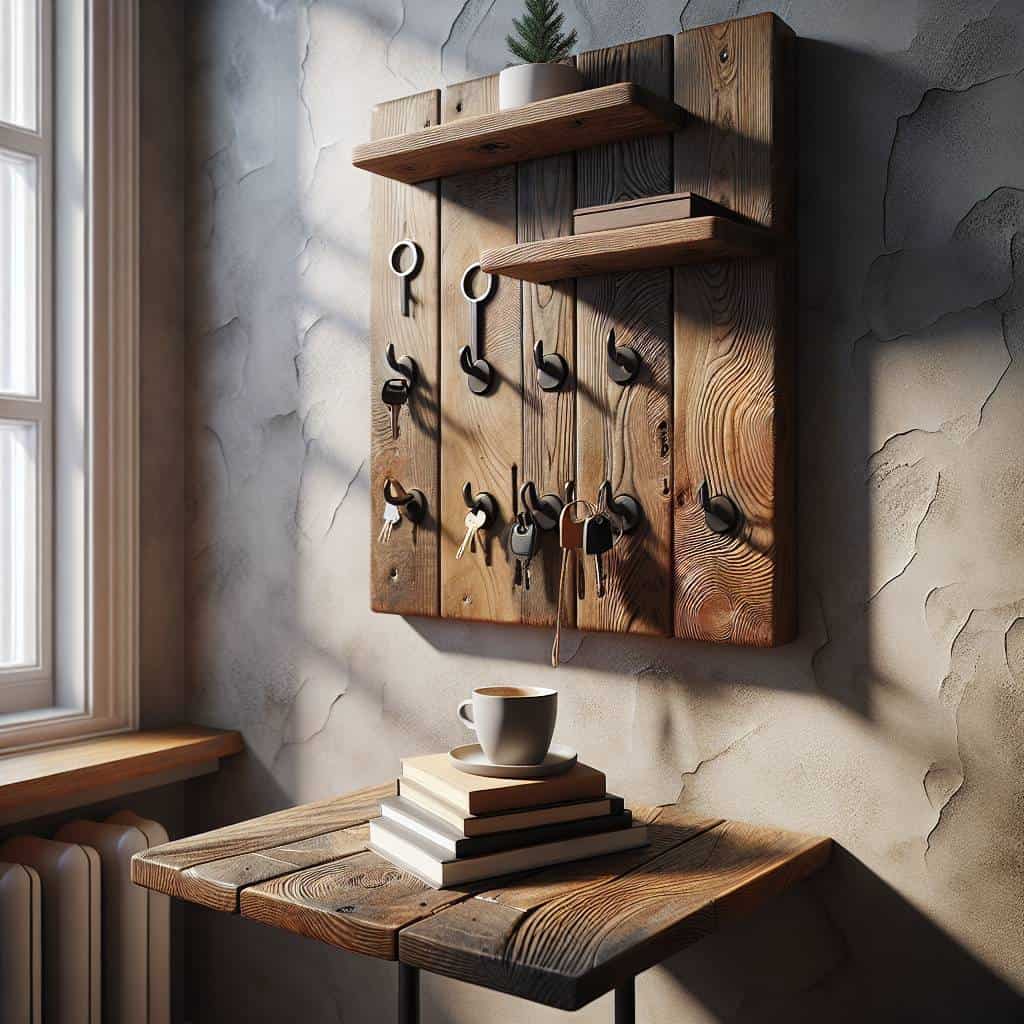
- 6. Now it’s time to add the finishing touches, including any decorative elements that will make your pet feeding station truly special. I like to use old keys, woven together with twine or wire, to create a unique wind chime or mobile. You can also add a nameplate, a coat hook, or any other element that reflects your personal style and creativity.
- 7. Finally, place your pet feeding station in the desired location and add the food and water bowls, as well as any other accessories you want to include. I find it helpful to step back and admire your handiwork, making any necessary adjustments before declaring the project complete. With a little creativity and some hard work, you’ve created a one-of-a-kind pet feeding station that’s both functional and beautiful.
Building a Pet Feeding Station
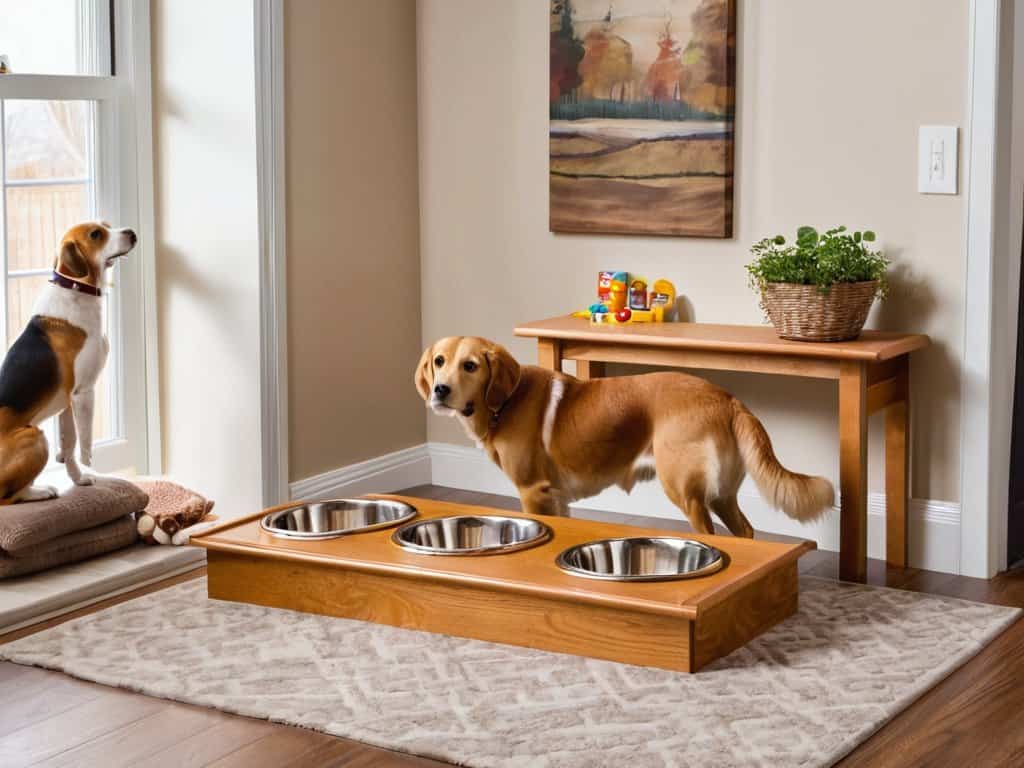
As I worked on my latest project, I found myself drawn to the idea of creating a custom pet feeding station that would not only provide a functional space for my pets to eat, but also serve as a unique piece of furniture in my home. I began by considering the benefits of elevated dog bowl benefits, which can help reduce strain on my pets’ necks and improve their overall dining experience. By incorporating this design element, I aimed to create a comfortable and healthy eating space for my furry friends.
In addition to the functional aspects, I also wanted to incorporate some personal touches into my design. I repurposed an old wooden crate to serve as a pet food storage solution, adding a charming and rustic element to the overall piece. This not only helped to keep the pet food organized, but also added a touch of nostalgia to the design. As someone who loves diy pet feeder plans, I enjoyed the process of bringing this unique project to life.
As I reflect on the process of creating this custom pet feeding station, I am reminded of the importance of considering the overall aesthetic of the piece. I chose a wooden pet feeder design that would complement the existing decor in my home, while also providing a sturdy and durable surface for my pets to eat from. By combining functionality with personal style, I was able to create a one-of-a-kind piece that showcases my love for custom pet feeding station ideas.
Custom Pet Feeder Plans With Storage
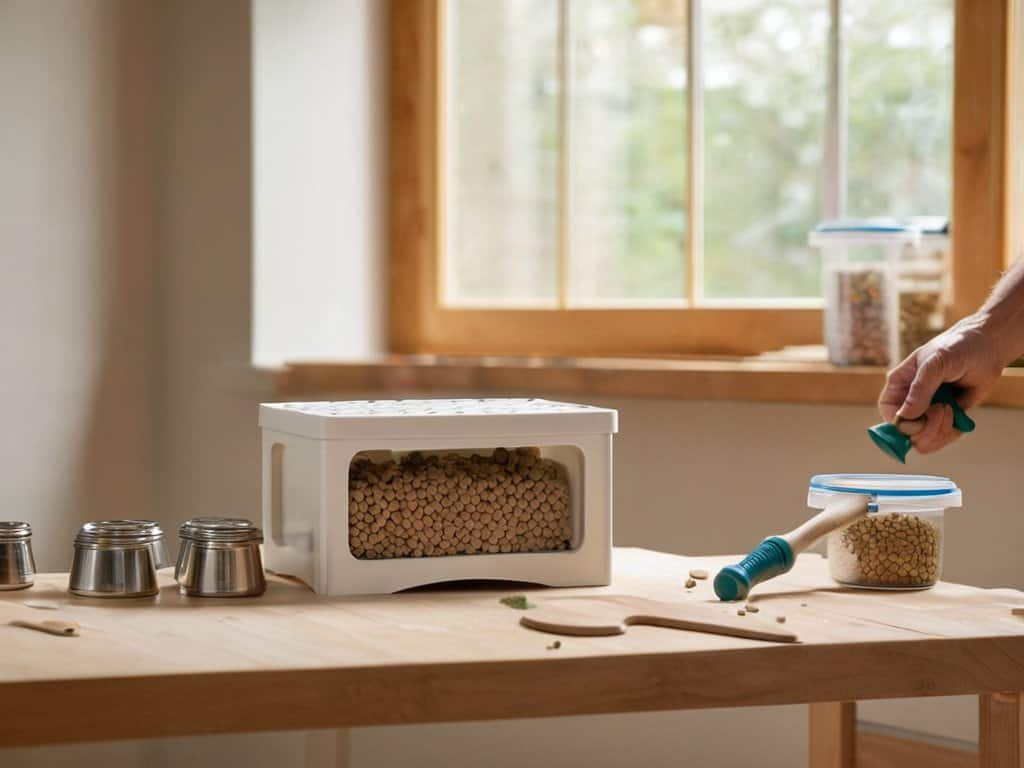
As I worked on my own pet feeding station, I realized the importance of incorporating storage for food, toys, and treats. I designed a custom plan that includes a pull-out drawer beneath the feeding area, perfect for storing kibble and snacks. The drawer is made from reclaimed wood, adding a touch of nostalgia to the overall design. I also added a small compartment on the side, adorned with an old key I had collected, to store my pet’s favorite toys and chews.
This custom storage solution not only keeps the feeding area tidy but also adds a personal touch to the overall design. By incorporating storage, the pet feeding station becomes a functional and beautiful piece of furniture that complements any home decor.
Elevated Dog Bowl Benefits Uncovered
As I reflect on my grandmother’s wisdom, I realize that even the simplest acts, like feeding our pets, can be elevated into meaningful experiences. The vintage-inspired pet feeding station I’ve created not only adds a touch of nostalgia to our home, but it also provides a comfortable and healthy eating experience for our furry friends. By raising the dog bowls to a comfortable height, we’ve reduced strain on their neck and joints, making mealtime a more enjoyable and dignified affair.
This thoughtful design has also helped to reduce mess and spills, making cleanup a breeze. Moreover, the unique focal piece – an old key I’ve repurposed as a decorative accent – sparks conversation and reminds us of the stories and memories we’ve shared with our pets. It’s amazing how something as mundane as a pet feeding station can be transformed into a testament to the beauty of reinvention and the joy of sharing life’s moments with our beloved companions.
5 Timeless Tips for Crafting a Whimsical Pet Feeding Station
- I always start by envisioning the story I want my pet feeding station to tell – is it a rustic, countryside tale or a charming, vintage narrative? This helps me choose the perfect reclaimed wood and decorative elements, like old keys, to bring the design to life
- Measure twice, cut once is my motto, especially when working with unique, salvaged materials that can’t be easily replaced – it’s all about preserving the integrity of the original pieces and the story they hold
- Considering the comfort and accessibility of our furry friends is paramount, so I recommend building the feeding station with elevated dog bowls to reduce strain on their neck and joints, making mealtime a delightful experience for all
- Incorporating storage for pet food, toys, and treats not only keeps the area tidy but also adds a functional layer to the design – I love using old trunks, chests, or even vintage suitcases to give it a nostalgic flair
- Lastly, don’t be afraid to add personal touches and embellishments, like a nameplate made from an old key or a handmade ceramic bowl, to make the pet feeding station truly one-of-a-kind and a reflection of your pet’s personality and your own
Timeless Tales and Practical Tips: 3 Key Takeaways
I’ve found that incorporating vintage elements, like old doors or windows, into your pet feeding station can add a touch of warmth and character to the space, making mealtime a unique experience for your pets
Repurposing old keys, a quirk I’ve grown fond of, can also be a creative way to add a personal touch to your project, whether it’s as a decorative accent or a functional piece, like a homemade keyhook for leashes
By combining functionality with nostalgic charm, as seen in my own grandmother’s antique feeder that inspired this project, you can create a pet feeding station that not only nourishes your pets but also tells a story and becomes a beloved part of your home’s history
Crafting with Heart
As we build a pet feeding station, we’re not just creating a functional space, we’re crafting a sanctuary that weaves together love, care, and a deep appreciation for the beauty of nostalgia, where every reclaimed board and vintage detail tells a story of devotion to our furry friends.
David Shelton
Conclusion
As we conclude our journey of building a pet feeding station, let’s reflect on the key takeaways. We’ve explored the benefits of elevated dog bowls, delved into custom pet feeder plans with storage, and discovered how these elements can come together to create a unique and functional space for our pets. By incorporating reclaimed materials and nostalgic designs, we can create a pet feeding station that not only serves its purpose but also tells a story. Whether you’re a seasoned DIY enthusiast or a beginner, this project offers an opportunity to unleash your creativity and make a meaningful contribution to your pet’s daily life.
As you put the final touches on your pet feeding station, remember that the true beauty of this project lies in its ability to bring people and pets closer together. The time and effort you invest in crafting this special space will be rewarded with countless moments of joy and companionship. So, take a step back, admire your handiwork, and let the satisfaction of creating something truly unique and meaningful wash over you. In the end, it’s not just about building a pet feeding station – it’s about weaving a tale of love and connection that will be cherished for years to come.
Frequently Asked Questions
What are the most durable materials to use for a pet feeding station that can withstand outdoor elements?
For a pet feeding station that can brave the outdoors, I recommend using durable materials like reclaimed cedar, teak, or cypress, which naturally resist rot and insects. You can also consider using recycled plastic or metal, like old galvanized tubs, to add a touch of rustic charm and withstand the elements.
How can I incorporate my pet's personal style or my home's decor into the design of the feeding station?
I love that question! To infuse your pet’s personality or home decor into the feeding station, consider adding custom paint colors, decorative trim, or even repurposed materials that reflect your style. For my own projects, I enjoy incorporating vintage hardware, like old door knobs or keys, to give each piece a unique character that tells a story.
What are some creative ways to add storage to a pet feeding station for food, toys, and other supplies?
I love incorporating hidden storage into my pet feeding station designs. Consider adding vintage crates or repurposed wooden boxes to stash food, toys, and treats. You can also use old mason jars or metal containers to store smaller supplies like leashes or grooming tools, giving your station a charming, eclectic vibe.