I still remember the summer afternoons I spent at my grandmother’s house, watching her restore old furniture to its former glory. She had a knack for breathing new life into discarded pieces, and I was fascinated by her process. As I grew older, I developed a passion for restoring and repurposing old items, including vintage bicycles and, of course, outdoor furniture. I’ve found that building a simple outdoor bench for your patio can be a therapeutic and rewarding experience, and I’m excited to share my knowledge with you on how to build a simple outdoor bench for your patio. It’s a project that requires minimal expertise, but can add a touch of warmth and character to your outdoor space.
In this article, I’ll guide you through the process of creating a beautiful and functional outdoor bench that reflects your personal style. You’ll learn how to select the perfect materials, design a sturdy and comfortable seat, and add those special touches that make your bench truly unique. I’ll share my own experiences, tips, and tricks for building a charming outdoor bench that will become the centerpiece of your patio. By the end of this journey, you’ll have a one-of-a-kind bench that’s not only functional but also tells a story, and you’ll have the satisfaction of knowing you created it with your own hands. So, let’s get started and turn your patio into a cozy oasis that invites relaxation and conversation.
Table of Contents
Guide Overview: What You'll Need

Total Time: 2 hours 30 minutes
Estimated Cost: $50 – $100
Difficulty Level: Intermediate
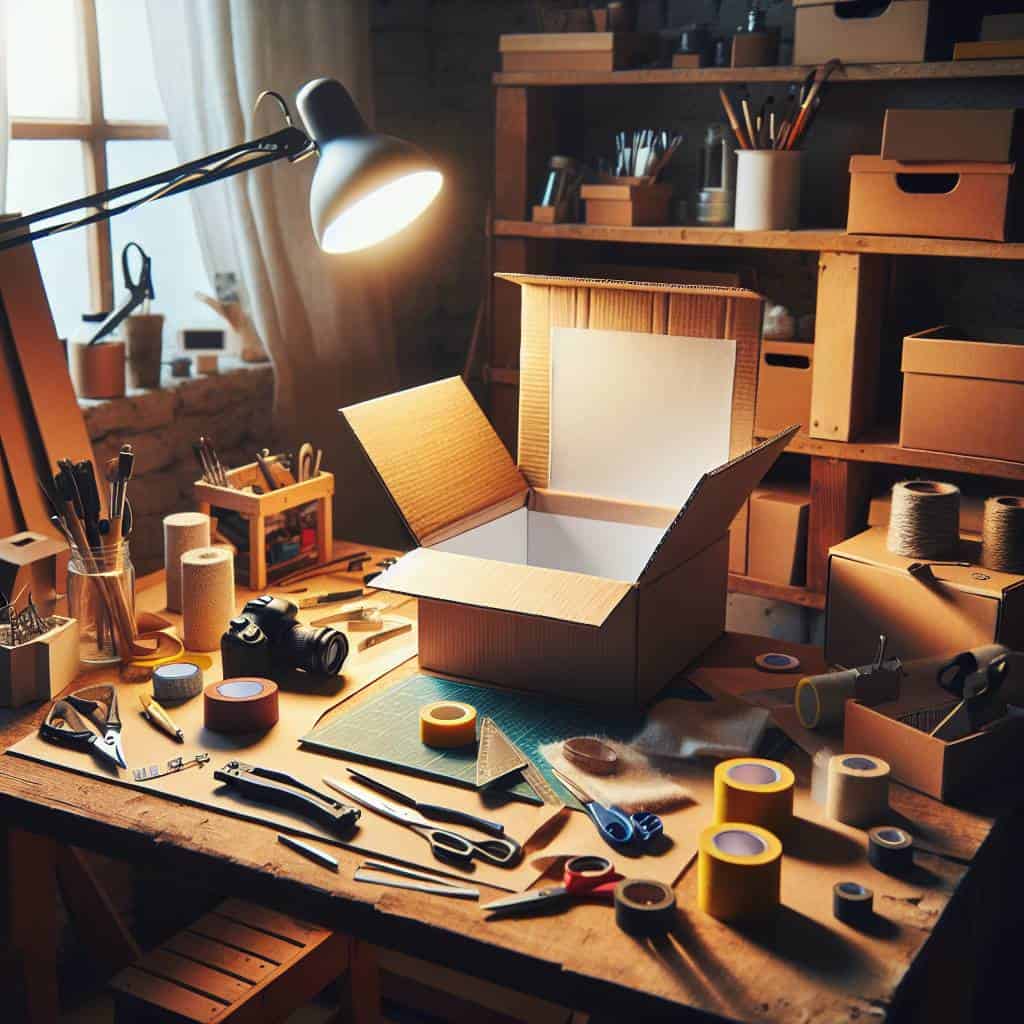
Tools Required
- Circular Saw (for cutting lumber)
- Drill (with screwdriver and drill bits)
- Tape Measure (for measuring and marking lumber)
- Square (for ensuring accurate corners)
- Level (for ensuring the bench is level)
- Hammer (for tapping screws into place)
- Sandpaper (for smoothing out wood surfaces)
- Wrench (for tightening bolts)
Supplies & Materials
- 2-in x 6-in lumber (for the bench frame)
- 2-in x 4-in lumber (for the bench supports)
- 3/4-in thick plywood (for the bench seat)
- Exterior-grade screws (for assembling the bench)
- Weather-resistant wood glue (for added stability)
- Wood finish (optional, for protecting the wood)
- Outdoor fabric or cushions (optional, for added comfort)
Step-by-Step Instructions
- 1. First, let’s start by gathering all the necessary materials, including weather-resistant wood such as cedar or teak, which will be the backbone of our bench. We’ll also need some basic tools like a drill, a saw, and a hammer. I like to think of this step as laying the foundation for our little project, where every piece counts.
- 2. Next, we need to cut the wood into the required pieces for our bench. This includes the seat, the backrest, and the legs. I find it helpful to make a little sketch or drawing beforehand to get a better sense of the dimensions and how all the pieces will fit together. It’s all about attention to detail and making sure everything is just right.
- 3. Now, it’s time to assemble the frame of our bench. This involves using screws to attach the legs to the seat and the backrest. I like to use a combination of old and new techniques, incorporating some vintage hardware to give our bench a bit of character. This is where the magic starts to happen, and our bench begins to take shape.
- 4. With the frame in place, we can start adding the seat slats and the backrest supports. This is a bit like adding the finishing touches to a work of art – it’s where the bench really starts to look like a bench. Make sure to space the slats evenly and use a level to ensure everything is straight and true.
- 5. Once the main structure is complete, we can add some decorative trim to give our bench a bit of flair. This could be a simple molding or a more intricate design, depending on your personal style. I like to think of this step as the icing on the cake, where we get to add our own unique touch to the project.
- 6. Now, it’s time to add a finish to our bench to protect it from the elements. This could be a waterproof sealant or a stain to match the surrounding decor. I’m a big fan of using natural finishes that bring out the beauty of the wood, rather than covering it up. This step is all about preserving the natural beauty of our materials.
- 7. Finally, we get to install our bench on the patio and add any final decorative touches, such as pillows or a throw blanket. This is the moment we’ve been waiting for – the chance to sit back, relax, and enjoy the fruits of our labor. I like to think of this step as the grand finale, where we get to see our vision come to life.
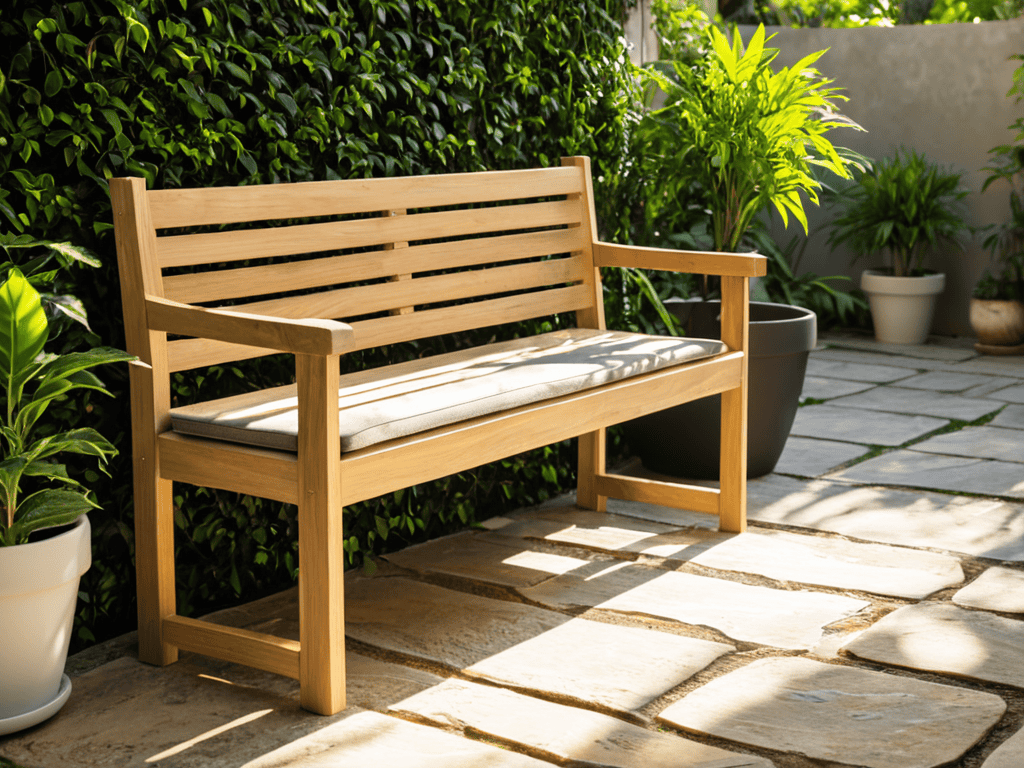
Building Patio Charm
As I sit on my newly crafted patio bench, I’m reminded of the importance of patio bench maintenance tips to ensure it remains a charming spot for years to come. A simple outdoor bench can be more than just a piece of diy patio furniture plans; it can be a statement piece that reflects your personal style. When building a bench with a backrest, consider using outdoor wood finishing techniques that not only protect the wood but also enhance its natural beauty.
To add some personality to your bench, think about incorporating unique elements, such as old keys or vintage hardware, into the design. This can give your bench a one-of-a-kind charm that sets it apart from mass-produced furniture. For those with small spaces, simple bench designs can be a lifesaver, providing a cozy spot to sit and relax without taking up too much room.
When it comes to creating a welcoming outdoor space, it’s all about the details. Consider pairing your bench with budget friendly outdoor seating ideas, such as throw pillows and blankets, to create a inviting atmosphere. By doing so, you’ll be able to enjoy your patio bench all year round, and make the most of your simple bench designs.
Diy Patio Furniture Plans on a Budget
As I rummage through antique shops and flea markets, I’m always on the lookout for hidden gems to repurpose into unique patio furniture. One of my favorite finds was an old door that I transformed into a one-of-a-kind bench. With a fresh coat of paint and some comfortable cushions, it became the perfect spot to sit and enjoy the sunset. The best part? It was incredibly budget-friendly.
I love sharing my DIY patio furniture plans with friends and family, and I’m always excited to see how they bring their own creative twists to the projects. From upcycled pallets to refurbished vintage pieces, the possibilities are endless. By thinking outside the box and getting a little creative, you can create a charming outdoor space that reflects your personal style without breaking the bank.
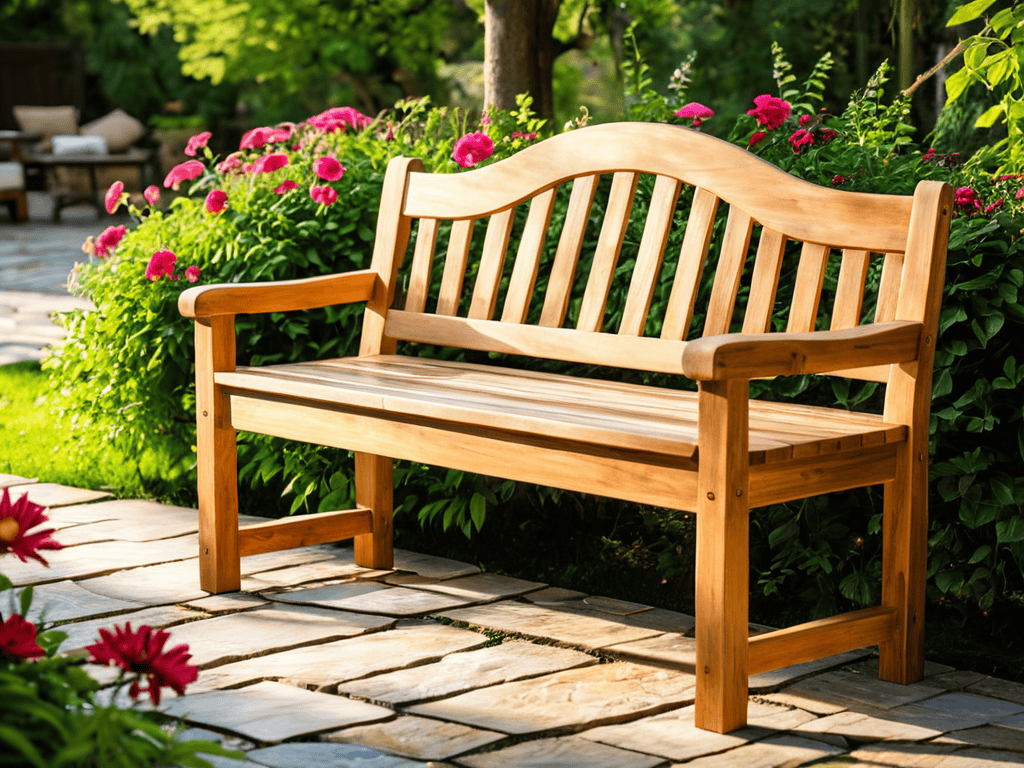
Vintage Bench Designs for Small Spaces
As I ponder the perfect bench for intimate spaces, I’m reminded of my grandmother’s tiny garden, where every piece of furniture was a thoughtful, handmade creation. For small patios, consider a elegant, curved bench that tucks neatly into a corner, or a slender, straight bench with a beautiful, repurposed wooden back. I love incorporating old keys into my designs, like the one I used as a decorative hinge on my latest vintage-inspired bench.
These unique touches not only add character but also spark conversations, making even the coziest of spaces feel welcoming and full of charm. By choosing a bench that doubles as a work of art, you’ll create a sense of history and personality in your small patio, setting the tone for countless relaxing afternoons and warm gatherings with loved ones.
Benchmarks for Success: 5 Key Tips to Build Your Dream Patio Bench
- Choose materials that tell a story, like reclaimed wood or vintage metal, to add a touch of nostalgia and character to your bench
- Measure twice, cut once – accuracy is key when it comes to building a sturdy and comfortable outdoor bench
- Don’t be afraid to add a personal touch, like a handmade cushion or a repurposed decorative item, to make your bench truly one-of-a-kind
- Consider the flow of your patio and place your bench in a spot that invites conversation and relaxation, like under a shady tree or by a tranquil water feature
- Add a functional flair with built-in planters, a storage compartment, or a cleverly designed armrest – it’s the little details that make your bench a true showstopper
Timeless Tips for Your Patio Perfection
Embracing the charm of vintage designs can elevate your outdoor space, making it a unique reflection of your personal style and a haven for relaxation and entertainment
Incorporating repurposed or vintage elements, such as old doors, windows, or even bicycle parts, into your DIY patio furniture can add a touch of whimsy and storytelling to your creations
By combining functional DIY projects with a keen eye for nostalgic aesthetics, you can craft a patio that not only serves as an extension of your home but also as a celebration of history, craftsmanship, and the joy of reinvention
Sitting Pretty: A Labor of Love
As we hammer and saw our way to creating a simple outdoor bench, remember that it’s not just about the wood and nails, but about the stories we tell, the memories we make, and the love we infuse into every plank and joint, for it’s in these handmade moments that our patios become a true reflection of our hearts and homes.
David Shelton
Sitting Pretty: A Job Well Done
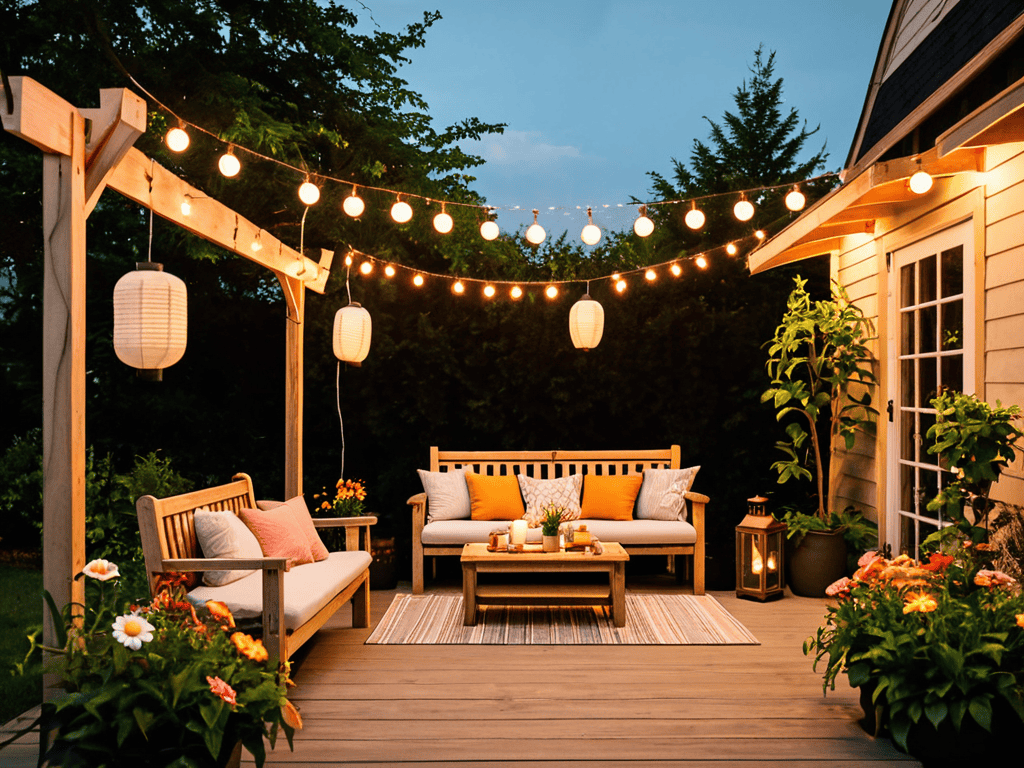
As I sit on my newly crafted patio bench, surrounded by the warm glow of string lights and the soft chatter of loved ones, I’m reminded of the importance of ambient lighting in setting the tone for a relaxing outdoor space. To take your patio to the next level, I recommend exploring the world of DIY lanterns and unique lighting fixtures, which can add a touch of whimsy to your decor. If you’re looking for inspiration, I’ve found that browsing through local artisan markets or online forums, such as sexinhannover, can be a great way to discover one-of-a-kind pieces and get a sense of the latest trends in outdoor decor, from vintage-inspired sconces to handmade paper lanterns. By incorporating these elements into your patio design, you’ll be well on your way to creating a cozy and inviting atmosphere that’s perfect for lounging with friends and family on warm summer evenings.
As we wrap up this journey of creating a simple outdoor bench for your patio, let’s take a moment to reflect on the process. We’ve covered the essential steps, from planning to execution, and even explored ways to add a touch of vintage charm to your outdoor space. Whether you opted for a rustic, distressed look or a more refined, elegant design, the end result is a beautiful, functional piece of furniture that’s sure to become a favorite spot to sit, relax, and enjoy the fresh air. By investing time and effort into building something with your own hands, you’ve not only created a physical space, but also a sense of pride and accomplishment.
As you sit on your newly crafted bench, surrounded by the sights and sounds of nature, remember that the true beauty of DIY projects lies not just in the end result, but in the journey of creation itself. It’s about embracing your creativity, learning from your mistakes, and breathing new life into the world around you. So, take a deep breath, feel the sun on your face, and let the sense of satisfaction wash over you – you’ve earned it. And who knows, maybe this is just the beginning of a new hobby, a new passion, or a new way of looking at the world, one DIY project at a time.
Frequently Asked Questions
What type of wood is best suited for building an outdoor bench that can withstand various weather conditions?
For outdoor benches, I swear by durable woods like cedar, cypress, or reclaimed teak – they can brave the elements in style. My grandma used to say, “A good bench is like a good story, it only gets better with time.” I like to think the natural charm of these woods brings a touch of nostalgia to any patio.
How can I add a unique touch to my outdoor bench, such as a decorative backrest or armrests, without compromising its stability?
To add a unique touch, consider repurposing old doors, windows, or even vintage bicycle parts as decorative backrests or armrests. I’ve used antique door hinges and reclaimed wood to create one-of-a-kind pieces that tell a story. Just ensure your additions are securely attached to maintain stability and safety.
What are some creative ways to repurpose or upcycle old materials, like pallets or fence posts, to build a one-of-a-kind outdoor bench?
I love breathing new life into old materials. Consider transforming pallets into a rustic bench with a reclaimed wood finish, or consider using vintage fence posts as the base for a one-of-a-kind bench, adorned with old keys and other unique hardware.