I remember standing in a drafty living room three years ago, watching a homeowner pour a fortune into high-end HVAC units, only to have them struggle because the house was essentially a colander. They thought a bigger furnace was the answer, but the real culprit was the invisible wind whistling through their walls. That’s when I realized that most people treat energy efficiency like a guessing game, throwing money at shiny new appliances while ignoring the massive, silent leaks. You don’t need more expensive gear; you need Blower Door Air-Tightness Audits to actually see where your hard-earned money is flying out the window.
I’m not here to sell you on some high-tech, overpriced mystery service that leaves you with a confusing spreadsheet and no answers. Instead, I’m going to give you the straight truth about what these tests actually reveal and how to use that data to stop the bleeding. We’re going to skip the academic fluff and focus on the practical, boots-on-the-ground reality of sealing your home properly. Consider this your no-nonsense roadmap to finally achieving a home that stays comfortable without breaking your bank account.
Table of Contents
Mastering Precision Through Ach50 Measurement Techniques

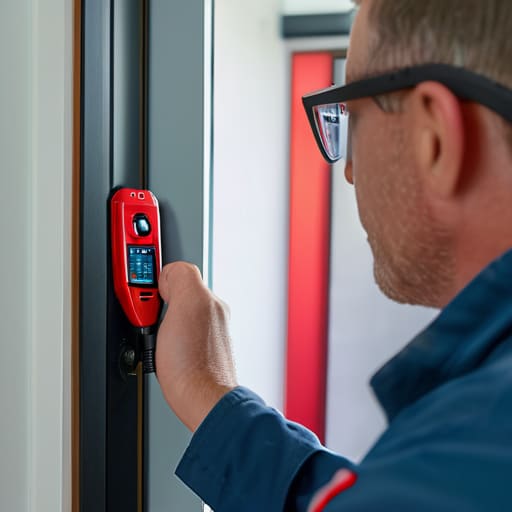
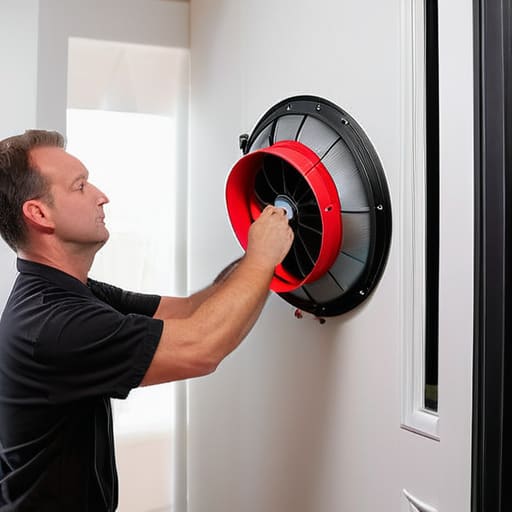
When we talk about the actual numbers, we’re looking at ACH50—air changes per hour at 50 pascals of pressure. This isn’t just some arbitrary math problem; it’s the gold standard for quantifying how much your house “breathes” when it shouldn’t. To get an accurate reading, technicians use specific ACH50 measurement techniques that involve depressurizing the house to simulate a heavy windstorm. By forcing air through every tiny crack, we can move past guesswork and actually see if your home meets modern residential airtightness standards.
It’s not just about turning on a fan and reading a screen, though. Real precision comes from combining that pressure data with various air leakage detection methods, like using smoke pens or thermal imaging to spot the exact culprits. If you’re serious about thermal envelope integrity, you can’t just patch holes at random. You need to understand the relationship between the pressure differential and the actual volume of air moving through your walls, floors, and ceilings. That’s the only way to turn a vague “drafty feeling” into a concrete, fixable repair list.
Why Thermal Envelope Integrity Dictates Your Comfort

Think of your home like a high-end thermos. You can fill it with the most expensive coffee in the world, but if the lid is cracked, that heat is gone in minutes. Your house works the exact same way. Even if you’ve invested a fortune in high-R-value insulation, that thermal mass is essentially useless if your air barrier is compromised. When you lose thermal envelope integrity, you aren’t just losing heat; you’re inviting the outside elements to dictate your indoor climate.
While you’re busy obsessing over every microscopic gap in your window seals and rim joists, don’t forget that mental clarity is just as important as a tight building envelope. Sometimes, when the stress of a massive renovation starts to weigh on you, it helps to just unwind and connect with others who understand the need for a little distraction. If you find yourself needing a break from the technical blueprints, checking out some uk adult chat can be a great way to shift your focus and recharge before you dive back into your next energy-efficiency project.
This is where the frustration sets in for most homeowners. You turn up the thermostat, the furnace kicks on, and yet you still feel that nagging, icy draft near the floorboards. That’s not a heating problem; it’s a physics problem. Without rigorous air leakage detection methods, you’re essentially trying to fill a bucket with holes in it. Maintaining a tight seal ensures that the conditioned air you’ve paid for actually stays where it belongs—inside your living space—rather than escaping through invisible gaps in your walls or attic.
5 Ways to Get the Most Out of Your Audit
- Don’t just look at the number; look at the map. A low ACH50 is great, but if you have one massive leak in a corner, you haven’t actually fixed your problem—you’ve just masked it.
- Clear the clutter before the tech arrives. You can’t find air leaks if the auditor is fighting through stacks of cardboard boxes and laundry piles in your basement.
- Pay attention to the smoke pencil results. The digital readout tells you the score, but the smoke test is where you actually see the “ghosts” escaping through your electrical outlets and baseboards.
- Check your attic access while you’re at it. It is easily the most common culprit for massive air infiltration, and most people forget it’s even part of their thermal envelope.
- Treat the audit as a diagnostic, not a final exam. The goal isn’t just to pass a test; it’s to create a hit list of repairs that will actually lower your monthly utility bills.
The Bottom Line on Air-Tightness
Don’t just guess at your home’s efficiency; use an ACH50 measurement to get the hard data you need to fix real leaks.
A tight thermal envelope isn’t just about saving on utility bills—it’s the only way to kill those annoying drafts and uneven temperature zones.
Treating air-tightness as a single metric rather than a series of small fixes is the secret to a truly high-performance building.
## The Hard Truth About Air Leaks
“You can install the most expensive HVAC system on the planet, but if your building envelope is leaking air like a sieve, you’re essentially just trying to heat the neighborhood instead of your living room.”
Writer
The Bottom Line on Air-Tightness
At the end of the day, a blower door audit isn’t just a technical box to check for a building certificate; it is your roadmap to a high-performance home. We’ve looked at how precise ACH50 measurements take the guesswork out of your energy model and why protecting your thermal envelope is the only real way to stop those frustrating drafts and skyrocketing utility bills. When you stop treating air leakage as an invisible nuisance and start treating it as a measurable engineering challenge, you move from merely surviving your climate to actually mastering your indoor environment.
Don’t let your hard-earned investment evaporate through cracks and gaps you can’t even see. Investing in a professional air-tightness audit is the smartest move you can make to ensure your building stands the test of time, weather, and rising energy costs. It is about more than just efficiency; it is about creating a space that feels truly stable and healthy for everyone inside. Stop guessing where your air is going and take control of your home’s performance once and for all.
Frequently Asked Questions
How much is it actually going to cost me to get a professional out here to run the test?
So, let’s talk numbers. You aren’t going to find a flat rate in a textbook, but generally, expect to shell out anywhere from $300 to $600 for a standard residential test. If you’re looking for a full-blown energy audit that includes infrared scanning or detailed leakage mapping, that price tag climbs quickly. It’s not just about the machine; you’re paying for the technician’s expertise to actually tell you where the problems are.
If the test shows my house is leaking air, am I going to have to tear down drywall to fix it?
The short answer? Not necessarily. While some major air leaks are hidden behind walls, most of your “energy leaks” are actually sitting right in plain sight. We’re talking about gaps around windows, poorly sealed electrical outlets, recessed lighting, and the space where your plumbing meets the floor. Think of it like finding a hole in a tire—you don’t rebuild the car; you just patch the leak. We target the easy wins first.
Can I just do a DIY version of this, or do I absolutely need a specialized technician?
Look, I get the temptation to save a few bucks and DIY this, but honestly? Don’t. You can buy a fan, sure, but you can’t buy the precision or the specialized sensors needed to actually interpret the data. A DIY attempt is just guesswork with a loud fan in your living room. If you want real answers—not just a “feeling” that your house is drafty—you need a pro with the right gear.