I was hunched over my workbench last Tuesday, the smell of sawdust and old linseed oil thick in the air, staring at a heavy, scarred oak door I’d rescued from a local salvage yard. Most people see a piece of discarded timber that’s seen better days, but as I ran my hands over the grain, I didn’t see junk; I saw the foundation of a workspace that would hold a lifetime of projects. There is a common misconception that you need a massive budget and pristine, store-bought lumber to build a professional-grade station, but the truth is that making a workbench from a door often yields a more soulful, character-filled piece than anything you’ll find in a big-box store.
In this guide, I’m going to strip away the fluff and show you exactly how to transform that forgotten slab into a sturdy, functional heart for your workshop. We’ll walk through selecting the right type of door, reinforcing the structure for real heavy-duty use, and incorporating those little design touches that make a piece truly yours. I promise no unnecessary complexities—just honest, practical steps to help you build something that tells a story.
Guide Overview
Tools & Supplies
- Drill/Driver for fastening legs and frame
- Saw for cutting support beams and legs
- Measuring tape for accurate dimensions
- Sandpaper for smoothing door edges
- Hollow core or solid wood door (1)
- 2×4 lumber (3-4 pieces)
- Wood screws (1 box)
- Wood glue (1 bottle)
Step-by-Step Instructions
- 1. Before we get our hands dirty, we need to find the right kind of door. I always look for something substantial—think solid oak or a heavy pine—rather than those hollow-core ones you see in modern apartments. Once you’ve found a piece that feels like it has a soul, bring it home and give it a thorough cleaning. You’ll want to strip away any old grime or loose flakes of paint just to see the true grain beneath, much like uncovering the history of a well-loved heirloom.
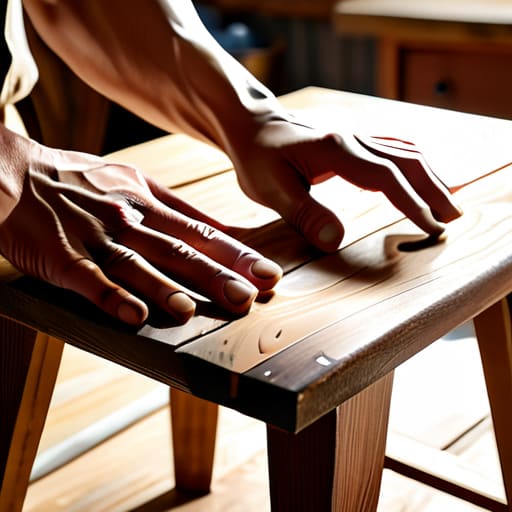
- 2. Next, we need to prepare the surface for its new life. Grab a sander and some medium-grit sandpaper to smooth out the most stubborn imperfections. You don’t want to sand away all the character or the “scars” that tell the door’s story, but you do want a smooth, workable surface that won’t snag your tools or your skin. It’s a meditative process, really—just you, the rhythm of the sander, and the wood revealing itself.
- 3. Now, let’s talk about the bones of the workbench. Since a door is essentially a flat plane, we need to build a sturdy frame to support it. I like to use thick, reclaimed 4×4 posts for the legs to ensure everything feels grounded and permanent. Measure your door carefully and cut your timber to your preferred working height, making sure your joints are tight and square. This is the foundation upon which all your future creativity will rest.
- 4. Once your frame is ready, it’s time to marry the door to the base. I recommend using heavy-duty lag bolts or specialized wood screws to secure the door to the top of your frame. If you want to be extra careful about preserving the aesthetic, you can hide the fasteners by countersinking them and plugging the holes with matching wood dowels. It’s these little details that transform a simple piece of furniture into a true work of art.
- 5. A workbench is nothing without a way to hold things steady, so let’s add some versatility. I love mounting a sturdy wooden vise to one end of the door. It’s a bit like adding a specialized tool to a vintage bicycle—it completely changes the capabilities of the machine. If you have any old, heavy metal hardware lying around from your recent flea market finds, this is a wonderful time to incorporate it into the vise or the mounting brackets.
- 6. Finally, we give the wood its protective coat. I prefer using a natural oil or a matte wax finish rather than a heavy, plastic-feeling polyurethane. This allows the texture of the wood to remain tactile and warm under your hands. As you buff in the finish, you’ll notice the grain pop and the colors deepen, finally bringing that forgotten timber into its new chapter as the heart of your workshop.
Upcycling Wooden Doors Into Work Tables With Soul

When you’re looking through local salvage yards or even your own attic, remember that not all doors are created equal. If you happen to find a solid oak or mahogany piece, you’ve struck gold—those are ready to become the centerpiece of your shop immediately. However, if you’re working with something more lightweight, you’ll need to consider how to reinforce a hollow core door for heavy use. I often find that sandwiching a layer of plywood between the door’s panels adds that much-needed heft and stability, ensuring your new surface can handle more than just a light dusting of sawdust.
Beyond the structural integrity, I always encourage you to think about the character of the wood. When upcycling wooden doors into work tables, don’t feel the need to sand away every single scratch or dent. Those imperfections are the fingerprints of history. If you’re on a tight budget, focus your energy on the workbench legs for door tabletop construction; a sturdy, well-built base will make even a modest door feel like a professional-grade station. It’s all about finding that perfect balance between rugged utility and the soulful charm of a reclaimed piece.
How to Reinforce a Hollow Core Door for Heavy Use
Now, I have to be honest with you: if you’ve found a beautiful vintage door that happens to be hollow core, we need to talk about structural integrity. While a solid oak door is a dream, many of us find treasures that are a bit more… airy inside. When it comes to repurposing old doors for workshop furniture, you can’t just slap some legs on it and hope for the best. To prevent that dreaded “spongy” feeling when you’re sawing or sanding, I recommend creating a hidden internal skeleton. A simple way to do this is to cut a few strips of plywood to fit snugly inside the door’s perimeter and glue them into the cavity. This adds much-needed rigidity without ruining the aesthetic of the surface.
For those looking at more intensive tasks, you’ll want to focus on your DIY door workbench frame construction. I love using a heavy-duty 2×4 subframe that sits directly underneath the door. By screwing this frame into the door’s existing stiles and rails, you effectively transfer all that heavy-duty pressure to the wood frame rather than the hollow center. It’s all about distributing the weight so your new workspace feels as sturdy as the stories it’s about to help you create.
Little Details That Give Your Workbench Its Heart
- Don’t shy away from the character of the wood; if your door has a few lovely dents or a bit of history etched into the grain, consider sealing it with a clear matte finish rather than sanding it away. Those imperfections are the fingerprints of time, and they make your workspace feel lived-in and soulful from day one.
- I always find myself looking for a bit of “found” hardware to anchor the design. Instead of using standard, sterile brackets, try hunting through local antique shops for some heavy-duty iron hinges or even an old skeleton key to use as a decorative pull on a small tool drawer. It turns a utility item into a conversation piece.
- Stability is everything when you’re mid-project, so treat your base like the frame of a vintage bicycle. You want it sturdy and balanced. If you’re working with a lighter door, I highly recommend adding a heavy-duty cross-brace underneath to prevent that dreaded wobble when you’re sawing or sanding.
- Think about the “reach” of your new station. Since doors can be narrower than a traditional heavy-duty workbench, I love adding a small, integrated shelf on one side. It keeps your most-used chisels or measuring tapes within arm’s length without cluttering that beautiful reclaimed surface.
- Layering is your best friend for longevity. Even if the door feels solid, adding a sacrificial layer—like a thin sheet of plywood or a piece of heavy linoleum—can protect the antique wood from glue spills or deep gouges, allowing the door’s original beauty to shine through for years to come.
The Final Piece of the Puzzle
As you stand back to survey your finished workbench, take a moment to appreciate the journey it took to get here. We’ve moved from the initial selection of that weathered, character-filled door to the essential structural work of reinforcing a hollow core, ensuring your new station is as sturdy as it is beautiful. By focusing on both the integrity of the frame and the soulful aesthetic of the timber, you haven’t just built a piece of shop equipment; you have successfully repurposed history into a functional tool for your future creations. It is the combination of careful reinforcement and a respect for the original material that transforms a simple DIY project into a lasting heirloom.
Ultimately, the beauty of a project like this lies far beyond the sawdust on the floor. It’s about that wonderful, slightly messy process of seeing potential where others only see scrap. Every time you set down a tool or sketch a new idea on this surface, you are continuing the story that the wood began decades ago. I hope this project has reminded you that nothing is truly obsolete if you have the vision to see it differently. So, grab your tools, find your next piece of forgotten treasure, and remember: every old key—and every old door—is simply waiting for someone with a little heart to unlock its true purpose.
As you start scouring local estate sales or even wandering through neighborhood garage sales for that perfect, character-filled door, I always suggest tapping into the collective wisdom of your community. Sometimes the most beautiful pieces aren’t found in a showroom, but in the stories shared by neighbors who know exactly where the hidden gems are tucked away. If you ever find yourself hunting for treasures in the Keystone State, you might want to chat with locals in Pennsylvania to see if anyone has a weathered heirloom or a discarded piece of history just waiting for a second chance. It’s often those personal connections that lead to the most meaningful finds for your workshop.